prepare surfaces for house painting
Surface preparation is one of the most important aspects of any house painting project, but it’s often underestimated or rushed by homeowners. This crucial step creates an optimal foundation for the paint job, enhancing its adhesion and improving its coverage and durability.
Whether you’re updating the interior of your home or preparing exterior surfaces for new paint, it’s essential to take the time to clean, repair and sand them before beginning. This process reduces the likelihood of sloppy or uneven paint and will make your finished project look better for longer. From selecting the perfect color palette to mastering the techniques of application, house painting encompasses both creativity and precision. In this comprehensive guide, we delve into the intricacies of house painting, exploring the processes, tools, and tips that turn dull walls into stunning works of art.
A dirty or untreated surface will bleed through the new paint, creating unsightly and inconsistent patches on your walls and trim. Cleaning and sanding the surface also prepares it for the application of primer, which seals the surface and helps to level any imperfections. Once the primer is dry, it’s ready to be painted. If you’re painting over existing paint, it’s a good idea to prime the entire surface. This ensures that the new paint adheres and prevents bleed-through. It also protects the old paint from sunlight and other contaminants that might discolor it over time.
Website design By BotEap.com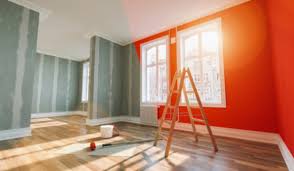
How do you prepare surfaces for house painting?
A professional will use a high-quality primer that’s compatible with the type of paint you’re using and will apply it in a uniform coat, following the manufacturer’s instructions for drying times. The priming step also makes sure that your final paint job looks crisp and clean, with no visible brush strokes or other imperfections. In addition to making sure the surfaces are properly cleaned and prepped, you’ll want to plan your paint job around the weather. Humidity will cause drips and slow the drying process, so it’s best to wait for a clear, dry day before beginning.
Once the surface is clean and dry, it’s important to cover areas that aren’t getting painted with drop cloths or masking tape. This will help protect furniture and other valuables from splashes of paint. It’s also a good idea to test the paint you’re going to use on an inconspicuous area of the wall or woodwork. Follow the recommended drying and application times, then look for signs of compatibility or adhesion problems before proceeding with a full-scale paint job. With proper planning and thorough preparation, a quality paint job will give your home a fresh and beautiful update that will last for years to come. For expert advice and service on your next painting project, contact the experienced team at Anderson Painting today. We’ll make sure your project is a success from start to finish! Contact us online to request your free quote. We proudly serve residential and commercial clients throughout the Greater Seattle area.